Syncthing 打造内网文件同步服务
最近折腾树莓派,顺便把这个写了。
毕竟树莓派是 24×7 在线的。
Syncthing

Syncthing 是开源免费的文件同步工具,通常用它同步多台电脑或设备之间的文件,它同样适合通过互联网同步文件,文件同步全程被高强度加密,安全快捷。所有关联设备上任何文件的创建、修改或删除都会自动的在其他设备之间同步。你的数据就是你的数据,Syncthing 不会把它们上传到云端,你的数据只会在你指定的设备之间传输。
与 BitTorrent/Resilio Sync 的不同之处?
两者完全无关且有所不同。Syncthing 与 BitTorrent/Resilio Sync 要做的事情是类似的,即在多台计算机之间同步文件。
BitTorrent Sync 现在改名叫 Resilio Sync 是一款面向 Windows、Mac、Linux、Android、iOS、Windows Phone、Amazon Kindle Fire 以及 BSD 系统的商业闭源点对点文件同步工具。而 Syncthing 是一款开源的文件同步工具。
Syncthing 采用开放源代码协议,具备定义良好的安全机制且源代码完全透明。Resilio Sync 采用的是未知的闭源协议,安全属性未知。
安全与隐私考量
- 隐私
你的数据只存储在你计算机上,没有中心服务器。 - 加密
所有数据均通过 TLS 加密的连接传输,完美的前向保密机制,防止任何窃听者访问您的数据。 - 身份认证
每个节点都由高强度秘密证书加密,只有你授权的节点才能与你建立连接。
安装
包命名规则 & 下载
1 | syncthing - 系统类型 - 架构 - 版本号 .tar.gz |
请根据你所使用的操作系统和架构类型,选择对应的软件包。
确认好系统与架构后,前往 https://github.com/syncthing/syncthing/releases/latest 下载最新的 Syncthing 发行版。
Linux
Syncthing 为 Linux 的各种常见的 CPU 架构提供软件包,笼统说有以下几种架构类型:
- 386/amd64
面向 PC 平台的 32 位和 64 位软件包 - arm/arm64
面向 ARM 平台的 32 位和 64 位软件包,树莓派就是这个架构的 - mips/mipsle
面向 MIPS 平台的 big endian 和 little endian 软件包 - ppc64/ppc64le
面向 PPC 平台的 big endian 和 little endian 软件包
下载 Binary 安装
1 | # 解压 |
包管理安装 (仅 apt 源,如 Debian/Ubuntu)
Stable 稳定版
1 | # Add the release PGP keys: |
Candidate 开发版
1 | # Add the release PGP keys: |
MacOS
使用 uname -a 来确定你的架构,输出的结果如果为 x86_64 代表 64 位,i386 代表 32 位。苹果近年上市的 Macintosh 计算机均采用 64 位架构。
下载解压后,进入包内将二进制文件复制到 /usr/local/bin 下:
1 | cd ~/Downloads/syncthing-macosx-*/ |
Windows
Syncthing 面向 windows 系统提供 32 位和 64 位两种软件包:
- syncthing-windows-386-xxxx.zip
- syncthing-windows-amd64-xxxx.zip
可以在 “控制面板→系统和安全→系统” 中的 “系统类型” 来确认当前的系统架构。
运行
直接启动
Syncthing 是使用 Golang 编写的,所以你可以直接启动他的二进制文件来启动 Syncthing。
1 | $ ./syncthing |
如果你已经将二进制文件复制到 /usr/local/bin 下,则可以直接运行(确认目录在PATH内):
1 | $ syncthing |
对于 Windows 用户,直接双击 syncthing.exe 即可运行程序。首次运行可能会有防火墙警告,允许访问即可。
启动后会自动打开浏览器并指向 127.0.0.1:8384 使用内置 WebGUI 来控制 Syncthing。
作为服务启动
Linux 下的 Systemd
对于采用 systemd 的操作系统可以创建两种类型的服务:
- User Service
用户级服务,只有在用户登录系统后 syncthing 才会启动。 - System Service
系统级服务,syncthing 随系统启动而启动,而不论用户是否已经登录系统。
建立用户
需要创建一个新用户来跑 Syncthing,如果你已经有了对应的用户,就可以跳过这一步了。
1 | # adduser demo |
有了新用户,就可以用这个用户来跑 syncthing 了。
系统级服务
1 | # 复制服务配置文件 |
1 | # 使用新用户启动服务 |
用户级服务
1 | # 复制服务配置文件 |
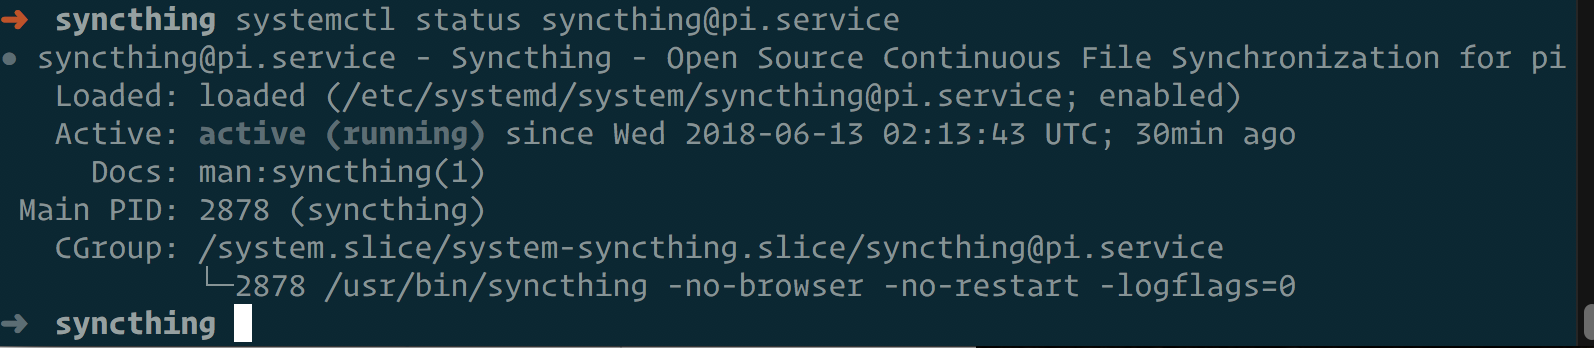
不出意外,应该显示为 active running
为 MacOS 添加自启动
打开软件包目录,进入 etc/macosx-launchd 文件夹,用编辑器打开名为 syncthing.plist 的文件。
将其中所有 /Users/USERNAME 替换为 /usr/local 。
将编辑好的 syncthing.plist 文件复制到 ~/Library/LaunchAgents 目录:
1 | $ cp syncthing.plist ~/Library/LaunchAgents |
注销并重新登录系统即可生效。
也可以直接执行以下命令,在不注销登录的情况下让设置生效:
1 | $ ~/Library/LaunchAgents/syncthing.plist |
若要取消 MacOS 的开机启动,用以下命令删除 syncthing.plist 文件,注销并重新登录系统即可。
1 | $ rm ~/Library/LaunchAgents/syncthing.plist |
配置 Syncthing
初次运行 Syncthing,界面大概是下面这样的:

首先提示了我们设置了远程访问,但是没有做安全配置。
可以点 Settings → GUI 来配置一下安全部分:
填写 GUI Authentication User 与 GUI Authentication Password 即可。
设置完成后,点击 “Restart Syncthing” 来使设置生效。
接下来登录就需要输入刚刚设置的用户名与密码了。
配置同步
首先通过右上角 “Actions → Show ID” 来获得当前设备的识别码,接下来在本地的设备里点击右下方的 “Add Remote Device” 来添加远程设备,将刚刚得到的 ID 填进去,完成设备同步。
这时远程将弹出提示,显示我们本地的设备请求了连接,确认是我们自己的设备后,可以确认添加设备。
这时双方均已经设置好设备,并同步了默认的目录了。
现在,放入本地计算机 ~/Sync/ 目录的文件或文件夹就会实时的同步到云服务器,云服务器端也是如此,所有放入 ~/Sync/ 目录的文件或文件夹也都会实时的同步到本地。
Syncthing 打造内网文件同步服务